10 TIPS FOR YOUR FIRST OUTDOOR CAR SHOOT
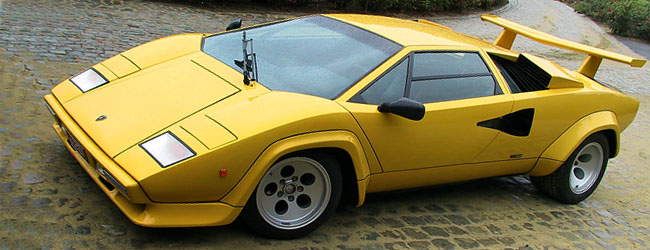
Canon PowerShot Pro90 IS - 7-70mm f/2.8 - 7.0mm 1/160 f4.0
Basic level tutorial by Mark
Tip 1 : Batteries and memory cards
Make sure your batteries are well charged. This might seem obvious, but we've all encountered this, halfway into the shoot the batteries for the flash run low only to die completely a few shots later.
Remember to charge the batteries for your camera and your external flash unit(s), have all those batteries charged the day before, also note that when the weather gets colder the batteries don't last long
 Always take some extra batteries fully charged in your bag, just in case, at least one for the camera and one set for the flash if you use an external one.
Format your memory cards inside the camera beforehand so they are empty when you arrive at the shoot ... after you've copied the files to your local hard disk naturally, this way you won't run out of space 'on the job'.
It is a better idea to have two or three cards of 4Gb instead of one big card of 8Gb or 16Gb, besides the price difference, the chance of either loosing or damaging more than one card is very slim.
Tip 2 : Location
You should have scouted for a location (or multiple locations) before the shoot, if you still have to look around for a decent place when the owner is standing in front of you he will not get the best impression.
 This also gives you the opportunity to check the position of the sun on a given time of day, this is equally (if not more) important as the location of your shoot. Select a location depending on the background you would like to add to your shot, make sure it is as clean as possible, electricity poles and trashcans are not ideal in a shot, try to avoid them at all costs.
If you are shooting on a parking lot try to avoid the white or yellow lines on the floor, they can be every useful to 'draw' attention towards the car, but in this case you'll have to position the car exactly right, in all other cases you'll have to get rid of them in post-editing, which could be very difficult as they will probably reflect onto the bodywork too.
 When you are looking for a nice location remember that bright colors in the background will draw attention away from your main subject ... the car, unless you are going to de-saturate those in post-processing you should try to do shoot slightly different angle and avoid them altogether.
Unless you are shooting an SUV or off-road vehicle stay away from trees, they give some very strange reflections on the shiny bodywork, especially on a dark color you get the most freaky shades you do not want and who are very difficult to remove in post-editing if at all possible.
Tip 3 : Timing
Once you have the car on the location you want make sure the sun is in your back, do not shoot the car into the sun unless you know perfectly well what you are doing and would like to have that special effect, however most of the time this will take some serious experience, so don't try it at your first shoot.
 A car is best shot with diffused light, this will imply that you are not shooting at noon, try to fix the shoot in the afternoon, sometime after 15h00 is a great time to start during the summer, you'll have great light for hours to come. Wintertime is a different story, the light could very well be gone by 17h00 so you can start at noon anyway if you can stand the cold.
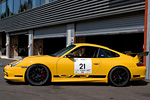
Shooting in the afternoon will avoid harsh shadows on the car, at noon when the sun is directly above you at full power you will probably overexpose the top of the car while the details on the lower side of the car will completely disappear in the shadows, the purpose of shooting a car is to have the entire car exposed just right, with enough light to bring out the shadows, but not too much light to clip the highlights into oblivion. A white car is especially difficult, as is a black car however the Porsche on this page was exposed perfectly well by shooting in the shadow at about 5 pm.
Tip 4 : Learn from others
Get some inspiration for your favorite car magazines. Go through your collection of recent magazines and think about the images they published, take a longer look and try to imagine how they made this shot.
With experience comes the ability to see an image in your head before you actually take it, this can be very useful when shooting a car outside, on your first shoot this could be a challenge, but still try to remember how you would like to have your picture come out, then try to compose the shot with the car in front of you.
Tip 5 : Polarizer
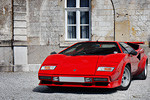 One of the most important filters when doing an outdoor car shoot : the circular polarization filter. It doesn't come cheap because you'll want to get a B&W or Hoya, but trust us, the results are so much better, especially when the sun is out.
A good polarization filter will eliminate (or strongly lower) any reflections from both the bodywork and the glass sections, if the windows aren't too darkly tinted you can actually see inside the car when using this type of filter.
Because the reflections are tempered you will have less problems with the surroundings around the car, these can give some very strange reflections on the bodywork, especially when trees are around, by setting the polarizing filter just right you might avoid these reflections completely.
If you want to bring out the shiny detailing done on the car you might consider leaving the polarization filter at home so the car has an intimidating reflection, but we would advice you to use this filter at all times when the sun is out.
Tip 6 : Stay clean
Make sure the car you are photographing has been meticulously detailed, if it's dirty it will not look great in the shot ... unless it's a 4x4 or something that people expect to be dirty. If you shoot a dark shade car take don't take it to a sand pit first if you are shooting multiple locations, the dust will ruin any subsequent shots.
 Check the tires when you shoot the car, they should have no marks on the side, also when the thread is in view make sure no small gravel remains in it, this gives a very untidy impression in your shot.
Shoot the car with all doors closed (unless it's a car with gullwing doors, then it's a feature) and check the side windows, they should be completely up. If there is an aerial make sure it is retracted and double check all doors, they have to be fully closed.
If you are really out of luck there could be a dent in the car ... re-position it to shoot the other side, people will never know there was a dent in the first place, same goes for rims, most cars worth while will have alloys mounted, make sure there are no scuffmarks on them, otherwise shoot the other side.
 This is even more important when you are doing interior shots, take a look at the TVR interior on this page, the seats are clean, no marks or streaks on the light leather, the dark blue carpets have been meticulously cleaned so no dirt is visible.
However there are a few mistakes in this shot : we should have put the steering wheel straight, now it is tilted to the left which is not good for the shot, more importantly there are papers all around, have the owner remove them if he's around, they distract in the composition and are near impossible to edit out afterwards.
Another detail is the hand brake lever, you should always try to shoot on level grounds, put the car in first gear and leave the hand brake down so it doesn't poke up into the shot like here, it is a nice, wood covered unit, but still it shouldn't be up like this.
(if the car is on a slant you could put bricks in front of both tires to keep it from rolling down the hill, but try to do interior shots on level grounds)
Tip 7 : Angles
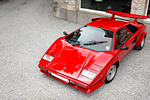 When you finally managed to get the car of your dreams in front of your lens you want to make sure you've got it from all angles necessary, this means you should at least shoot the following ones : front 3/4 view, rear 3/4 view, full side view, full front view, full rear view, engine shot, dashboard and interior shot.
After you've got these you can get creative and try different angles and altitudes, don't hesitate to get low to the ground or use a stepladder to get a higher point of view on the car, those nice foldable ladders work very well in this case, they fit into the trunk of your car and you still can get relatively high.
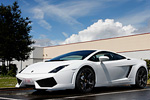 Shots from a higher elevation work very well if the concrete isn't too badly cracked, otherwise try to move the car a bit, don't use a ladder on grass, you could end up tilting over because of the softer ground, be careful with this.
One problem with low angle shots is the fact the your sky will get blown out quickly, resulting in a totally white area, which isn't too nice in a shot, you should try to underexpose the shot to get the sky in a nice blue shade, however this could cause your shadows to get too dark so perhaps two different exposures would be a good idea here (read our special tutorial on bracketing your exposures).
Tip 8 : The lens
The lens you are taking to your first outdoor car shoot is very important, depending on your location you will have to select a focal range that will work, if you are thinking about shooting with a 70-200mm lens you will need wide open spaces.
The resulting shots will be great, but it won't be practical, you are much better off with a nice standard lens like a 17-55mm or something similar, the wide angle will allow you to stay relatively close to the car, especially important when you are working in a public place were people can walk into the frame at any given moment.
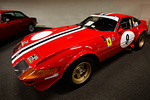 Don't go for an Ultra Wide Angle (UWA) like a Canon EF-S 10-22 or something like that, sure it will allow you to nearly sit on the car while photographing it, but such an extreme wide angle also gives unwanted distortions, for your first shoots stick to the base lens we've discussed in our Must have base equipment tutorial.
One small detail that is also often overlooked : keep your lens clean, smudges, water drops and large dust speckles can show up in your final shot, always keep a nice soft cloth with you to clean the lens from time to time, a manual air blower works wonders on dust, both inside and outside of your lens.
Tip 9 : Burst mode
Use burst mode, just in case your first shot has some camera shake in it, chances are your second shot will be tack sharp. We always use burst mode, even when doing a photo shoot, two or three shots of the same composition are enough (don't want to fill up your memory card too quickly), this will ensure that you'll end up with at least one tack sharp image ... just delete the rest afterward on your PC, do not judge the images on the small LCD screen at the back of your camera, most of the time you can not really get a correct impression from it anyway.
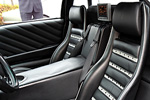 Multiple shots are also very useful when doing interior shots of a dark upholstery, this will lower your shutter speed considerably, sometimes down to 1/8 or 1/15, which is very difficult to hand hold steadily, even with an IS lens, taking two or three shots immediately behind each other will surely give you one or more really sharp ones.
This could be a problem on very recent cameras however, with an FPS of 6 or more these days you get a lot of shots when you're not careful, on a Canon EOS 40D for instance you have two burst modes, one with about 3 fps and one with 6.2fps, the first one is perfect for this method.
On thing to remember when doing interior shots of a dark upholstery is the fact that the outside will probably be overexposed like in the shot we've shown, this can be corrected in two ways, both of which we discuss in our special Interior shooting tutorial.
Tip 10 : Shutter speed
There is a limit to what most people can manage when holding the camera in their hands, it is actually quite simple, take the focal length you have the lens set to and multiply this by 2 to be one the safe side ... this is your ideal shutter speed.
For instance when you are shooting at 50mm your shutter speed should be at least 1/100, 200mm focal length and you end up with at least 1/400 for the shutter, on a bright and sunny day this will be no problem whatsoever, you'll end up with shutter speeds of 1/1250 or higher.
 Remember we've advised you to get a lens with some kind of stabilization in our Must have base equipment article ? This will allow you to drop your shutter speed dramatically, some lenses even offer 4-stops of stabilization (eg the Canon EF 70-200 f/4.0 L IS USM), which means that instead of using 1/400 (at 200mm) you could get away with 1/100 and still come home with perfectly sharp images.
A a sunny day mid summer you can easily reach extremely fast shutter speeds, the shot of the yellow Porsche was taken at 1/3200, the risk of camera shake at that shutter speed with a focal length of only 28mm will be extremely small.
Bottom line
An outdoor car shoot is probably the next best thing compared to a real studio shoot, however renting a studio and equipment large enough to photograph cars could be very expensive and require some serious travelling, so we prefer outdoor shoots given you have several nice locations, if you are shooting larger numbers of cars over a given period it is always a nice option to have multiple locations you could select depending on the car.
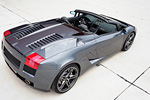 A race car shouldn't be shot on a grass field but rather on some concrete, preferably even a pit lane or something that resembles it, a modern car can be put in front of a modern building while a classic car feels more at home around older mansions.
Industrial zones on Sunday, when all the business are closed, are also a good place to shoot modern cars, most of the time office buildings are rather modern ... and deserted on Sunday.
Take into account that some areas are restricted for photographing, if in doubt check with the local police or security guards ... parking lots are very nice backgrounds if selected carefully, but expect a visit from the security people if you didn't notify them of your intentions. Just talk to them in advance, most of the time they have no problem with you bringing in a car into the parking lot if they know about it.
When you shoot an exotic or rare car in such a place ask them to pose next to the car and offer them a printed 6x4 for their effort, this will put them at ease and give you some credit the next time you are looking for a location, you might even get a free exit pass if there is a fee.
 |
CPT Premium member BONUS : 176486 If you would like to print the 10 tips for your first outdoor car shoot article you can download our special PDF which is optimized for hardcopy layout. |
Note : commercial use or publishing of our tutorials in any way, written or electronic, is strictly forbidden, we present these for your personal development only. None of our material may be published in any way without prior, written permission from the Car Photography Tutorials founder. All workflows and photographs are copyright protected and owned by the Car Photography Tutorials team unless stated otherwise
Advertisement
Become a MEMBER
Premium Membership
Become a CPT Premium Member and download all our tutorials including a PDF for printing and the result as a PSD file with layers if any.
Interesting articles
Our 60 second workflow on automotive photos
Only have a minute to spare ? Don't worry, that's more than enough to make your photograph stand out of the crowd.
Scale car photography explained in detail
In this article I guide you into scale car photography, from the preparation over the setup including lights, aperture, shutter speed and then taking the shot ... a lot of these tips can be used on full size cars too.
Lenses, what do all those characters actually mean ?
Looking for a new lens but got at bit confused with all those terms ? We explain them in understandable English for you.
Post processing automotive event photographs
We all know the drill, we’ve been to a car show or outdoor event and we’ve encountered some amazing cars but our shots have bad backgrounds so we'll have to revert to post processing to get it right.
DOF - Depth of Field
In this article we take a look at the different aperture settings you can use while photographing cars, setting your DOF can create some amazing effects.

