CREATING A PHOTO FROM A SHOWROOM SNAPSHOT
Canon EOS5D Mark II - Canon EF24-105mm f/4.0 L IS - 45mm 1/4 sec f5.6 ISO100
Intermediate level tutorial by Mark
When I visit the Geneva Auto Show we just have to stay overnight, I drive up to Switzerland the day before the press days so I can get a good night of sleep before I spend all day searching for the best shots during the show, in the evening I get back to the hotel, have a nice dinner and get some sleep to be ready to head back home the next day ... and most of the time I take the more scenic route into Switzerland and make a stop in Porrentruy ... home of Affolter, one of the largest Lamborghini dealers in Europe, with a massive showroom holding lots of Raging Bull ... problem is they are tightly packed together, so making nice photos is a somewhat difficult experience ... but I will show you how to get some really nice looking shots anyway.
Just to show you how difficult working in that showroom as a photographer gets I will firstly give your the OOC shot I am about to post process :
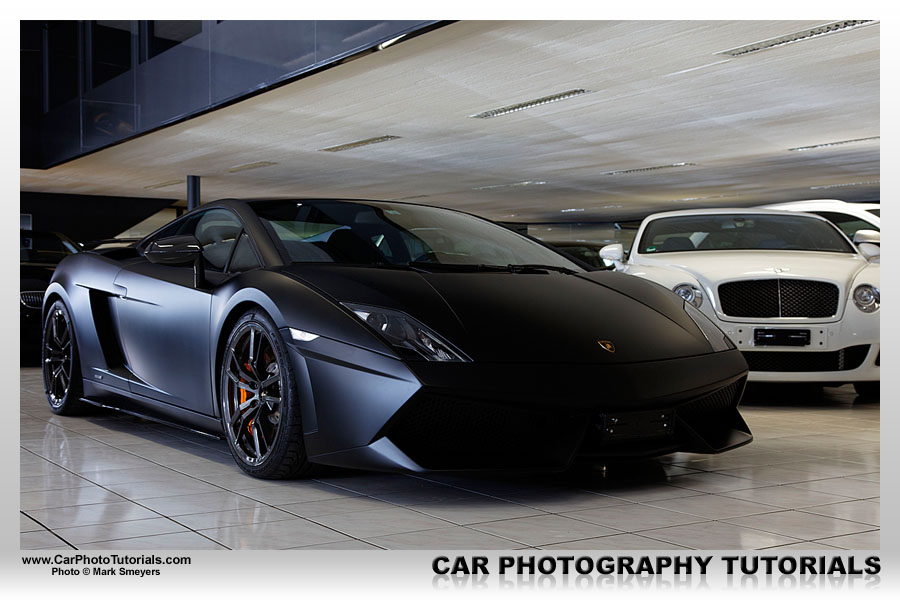
As you can see it isn't the best shot in the world, personally I would grade this one as a snapshot to be honest, but I really liked this car so I started thinking how I could make it look better, possibly get a photograph out of it in the end.
I have been to this showroom several times over the last few years, so I already knew the lighting inside is really bad, and if it is a sunny day you get massive floods of light on one side and near dark on the other side ... and I just didn't want to set up several off camera flash units here, you never know someone knocks over a stand onto a 300k Euro Lamborghini.
This time I took along my tripod to make sure I had a solid stand to take multiple shots ... you remember me talking about taking a burst of three shots: one correctly exposed, one over exposed and one under exposed ... so we get the highlights and the shadows right and bring them all together in PhotoShop ... and this is exactly what I had in mind for this car.
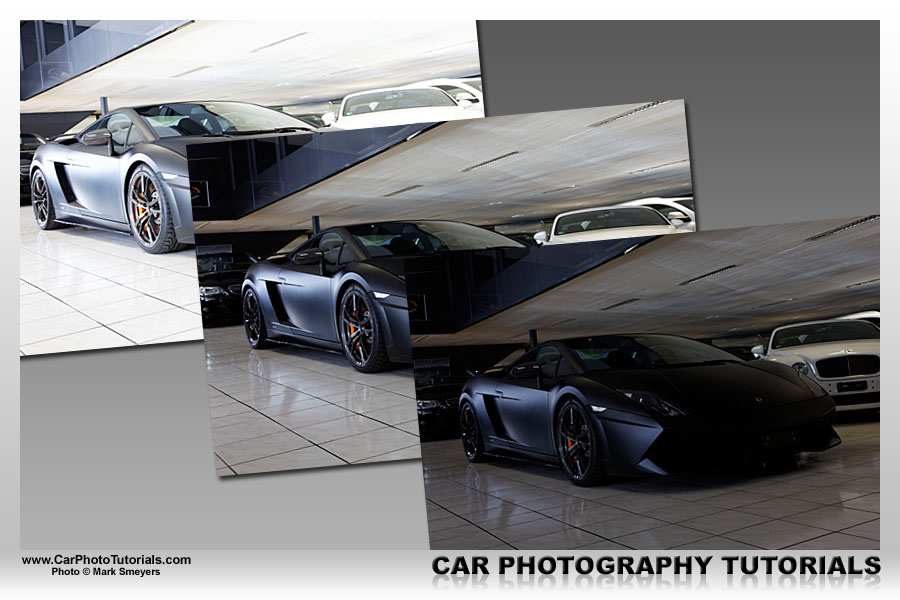
Here we have two stops over exposed, normal exposure and two stops under exposed ... and because I had the camera on a solid tripod all three shots are exactly in sync, I can now put one on top of the other and work with the parts I need for my final shot, as this was a mat black car it took some over exposure to get the air intakes visible again without having the bodywork too bright.
So I load the first shot I need, the over exposed one that nicely shows the grilles inside the front and side air intake of this Lamborghini Gallardo LP570-4 Superleggera:
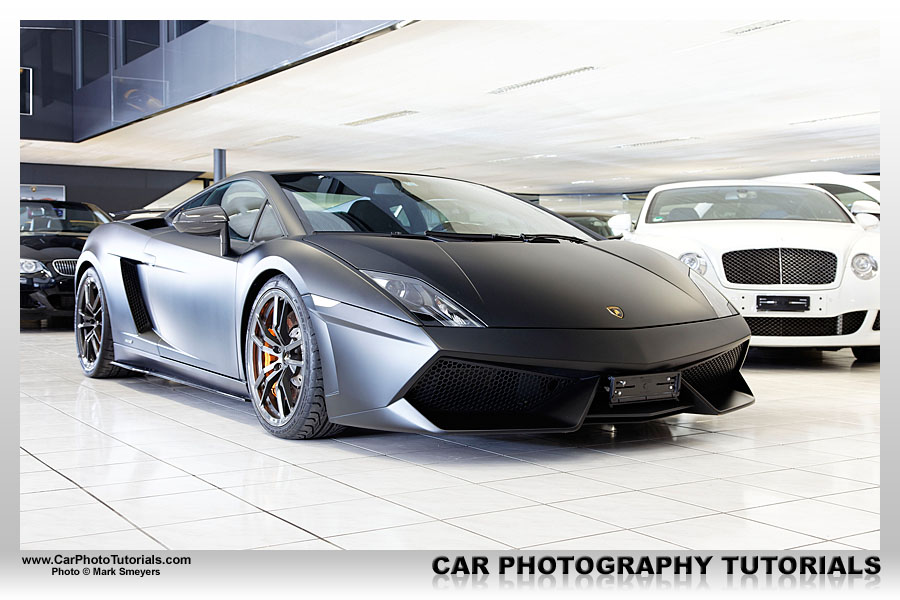
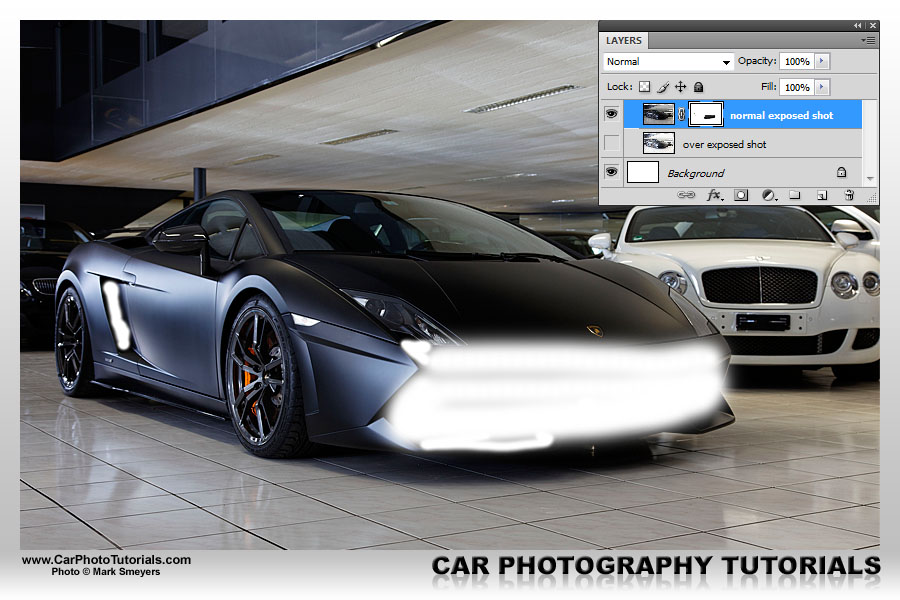
Now is time to overlay a less exposed version of this photo on top of this one, so I load the 'normal' exposure into PhotoShop to get rid of the serious blow outs in this over exposed shot, a trick I will attempt by using layers and 'painting' on the layer mask to reveal the underlying layer again.
In this photo you can clearly see the air intakes and grilles are no longer visible, by using a layer mask and painting with a soft brushed black shade over the intakes we actually allow the over exposed shot that was first completely hidden by this one to come through again, but only in those sections I need more light, which on this specific shot are just about the entire front section and the side air intakes:
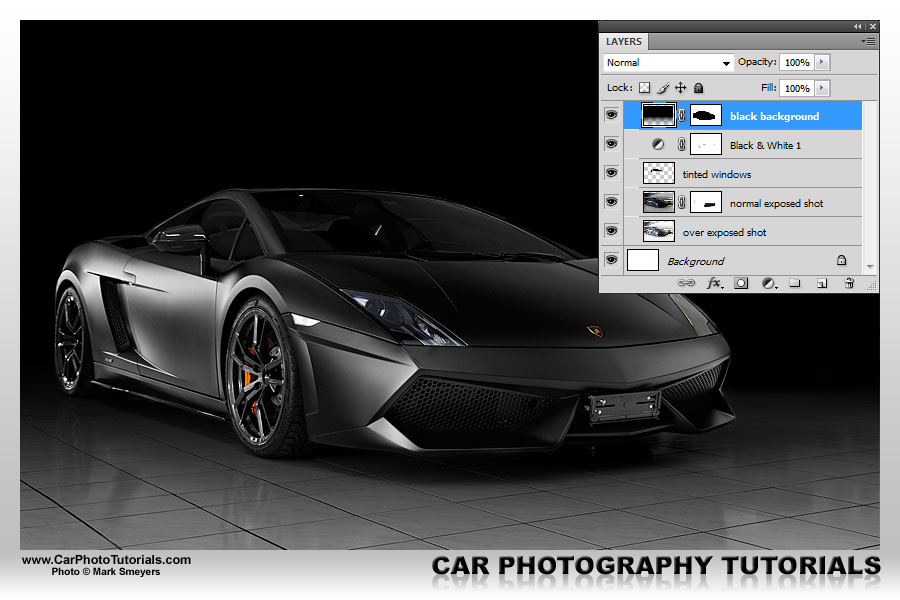
I now have the bodywork looking almost the way I want, but as you probably know I will be removing the entire background in this snapshot too, I like a Bentley and that BMW behind this Lamborghini isn't too bad either, but I don't want any distractions from the mat black, Nero Nemesis Superleggera in this photo, so everything else has to go ... and unlike most people I also take care of the windows as they will show the background of not covered up.
I for one really like dark tinted windows, so that is exactly what I'm going to put on this black Lamborghini, just add a new layer on top of those already in the shot, set it to 'Overlay' and use the 'Polygonal Lasso Tool' with the straight lines to select the window sections on the shot, make sure not to cover too much bodywork, but if you do it isn't a big issue, you can always erase it later on or paint some extra on it ... in the end I want to have this look on the windows:
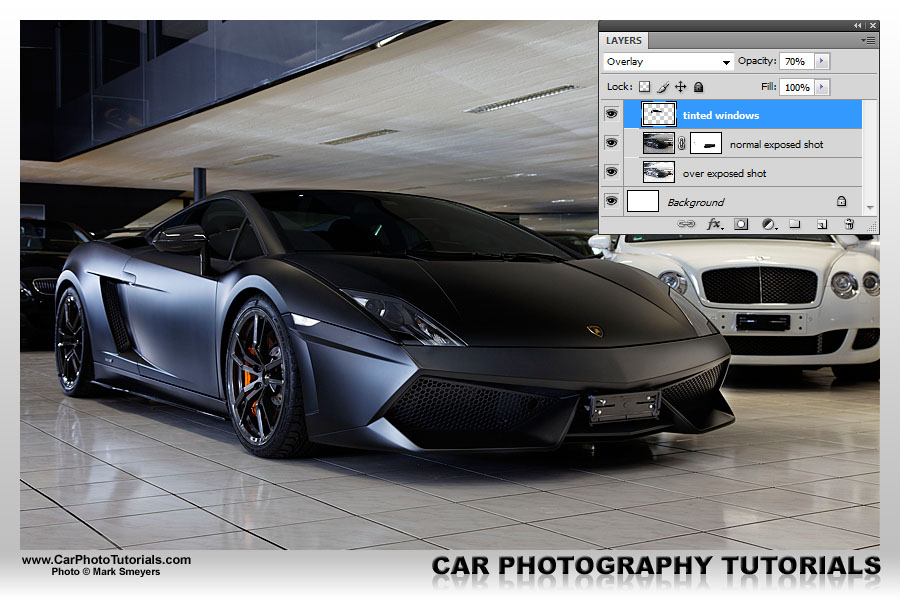
Most likely the effect of the black paint on the windows will be too harsh, so I lower the opacity of the layer holding the tinted windows to about 70%, which makes it look just right. That is why you should always work on layers, that way you can play around with opacity settings, erase or paint some extra black where you've got the selection wrong ... this is called 'non destructive post processing' ... if you make the upper layers invisible you just end up at the starting point again, no damage to the original photo, and nothing that holds you back taking another attempt at post processing in the future.
Next step for me would be to remove that blue color cast on the side, we are looking at a mat black car here, and I really don't like that blue tint in the side of it, the easiest way to tackle this problem is to turn the shot into a black and white photo ... there are no color cast in a b&w shot.
Again I am following the non-destructive route here, so I add an adjustment layer holding the black & white filter, do note that adjustment layers come with an automatic mask most of the time, which happens to be just right as I really like to keep the gold Raging Bull logo up front and those contrasting, bright orange brake calipers ... so I just paint a little touch of black over those sections to remove the black and white filter on them.
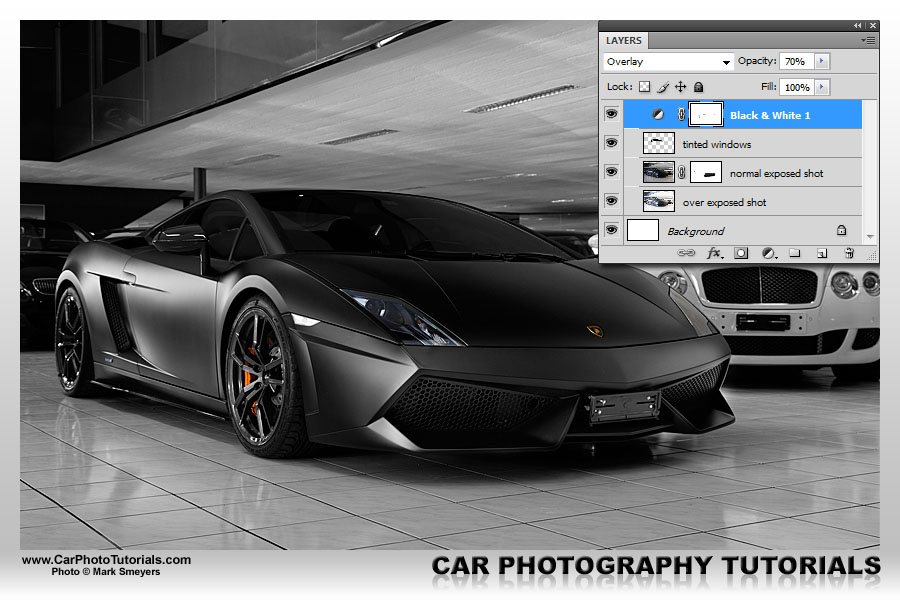
Do you notice the car looks a lot more intimidating in this neutral black shade ... just the way I want it to look, like a monster from below ready to attack when you look the other way. Now the time has come to get rid of that background that is pulling way too much attention to itself, attention the Lamborghini should be getting, so I add a new layer all the way at the top and fill it with a gradient going from full black at the top to transparent towards the bottom ... which covers part of the car naturally:
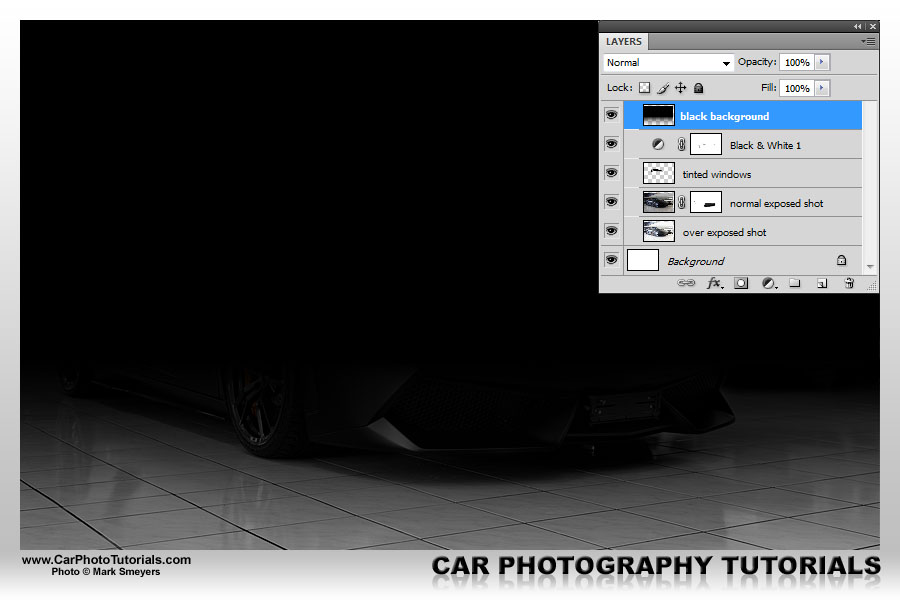
Just guess how I'm going to solve this problem with the black gradient ... yep, you got it right: I'm going to put a layer mask on it and start painting black over it to make the Lamborghini visible again. Do note that this will take some time, a lot of patience, and most likely some switching between painting in black and painting in white when you've 'uncovered' too much. Most of the time I start with a rather large, soft brush and work my way down to a much smaller, sometimes even hard brush for the smaller details ... after a while I end up with a result like this:
I must admit this previous step is probably the most time consuming of this entire post processing work, but the more time you put into getting this mask just right, the better the photograph will look in the end, you can spread this work over multiple attemps if you get nervous half way along ... or perfect it the next day, trust me, sometimes you just can't get it right the first time, just keep trying, you will get there in the end.
Almost there I guess, but I always try to go that extra step when it comes to post processing photos, so in this case I'm still not too happy about those bright tiles in the foreground, so adding a new layer with a black to transparent gradient at the bottom makes the photo look a lot better already, I did lower the opacity to 65% to make the reflection of the car visible again, I rather liked that to be honest.

To really put the finishing touch into this photograph I added my usual SoftLight layer on top of it all and used another black to transparent gradient at the top and bottom to make the car really stand out from the frame, being a black car this isn't too easy either, but I think the small touches of orange and gold work nicely together with the dark, sinister look I was after in this case.
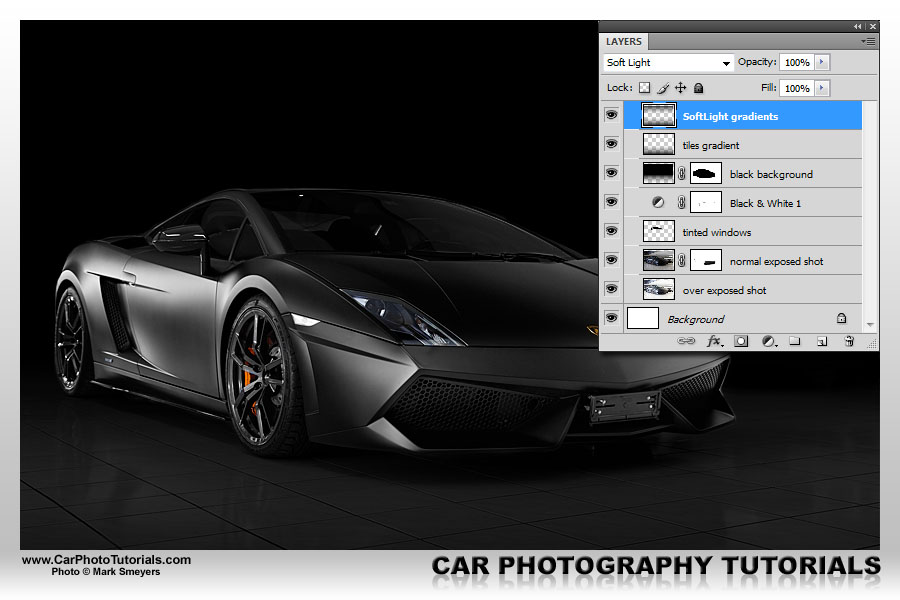
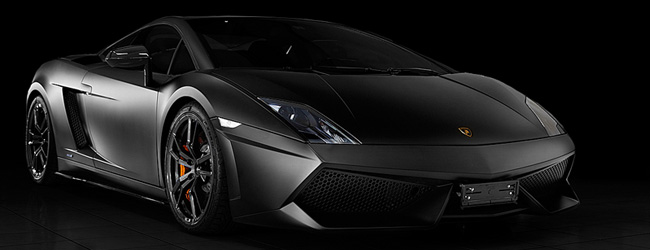
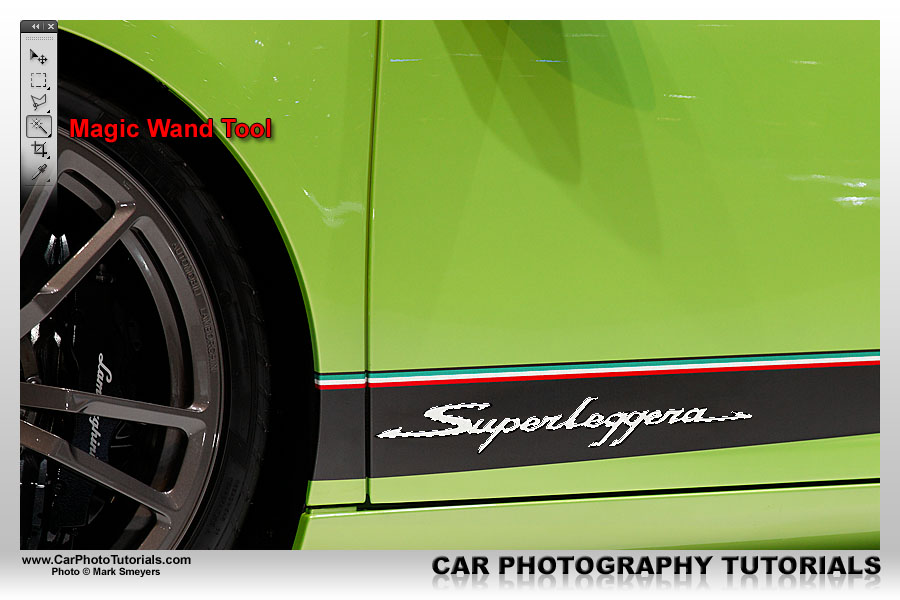
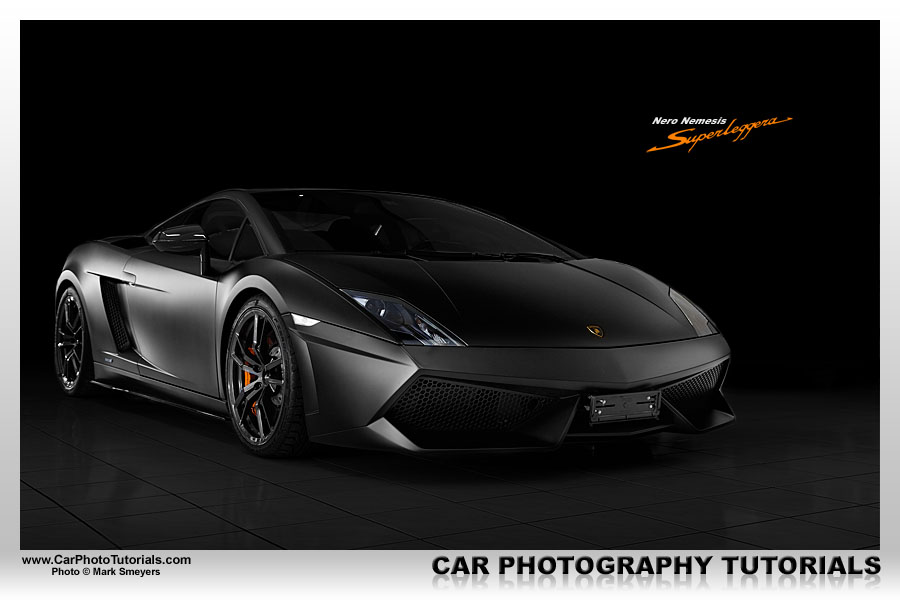
With this last action I'm rather pleased with the look of this photograph, I effectively turned a mere snapshot into a photo, and the car looks amazing with no distractions in the background anymore. If I would print this one in a large size and mount on my wall in the office this would be the end of the post processing work for me. But I had a second purpose in mind for this lightweight (it is a Superleggera you know) so I wanted to add a small extra touch in the upper left corner ... the very stylish Superleggera script Lamborghini uses on this model, only problem: there is no font available to write this ... but I have found the perfect solution.
I had a side shot of the original Superleggera model when it was unveiled at the 2010 Geneva Auto Show with a close up of the script on the lower front section of the door, as this is a white script on a black background it is very easy to use the Magic Wand Tool in PhotoShop to select only the text, copy it and subsequently paste it into the photo of the black car.
I paste the Superleggera script onto my mat black Lamborghini Gallardo LP570-4 photo, positioning it in the upper right corner and making it the perfect size to be visible, but not draw too much attention to itself, I for one didn't like the white on this script so I changed it to orange to be color coded with the brake calipers on the black Gallardo, just use a layer style colorize to get this look.
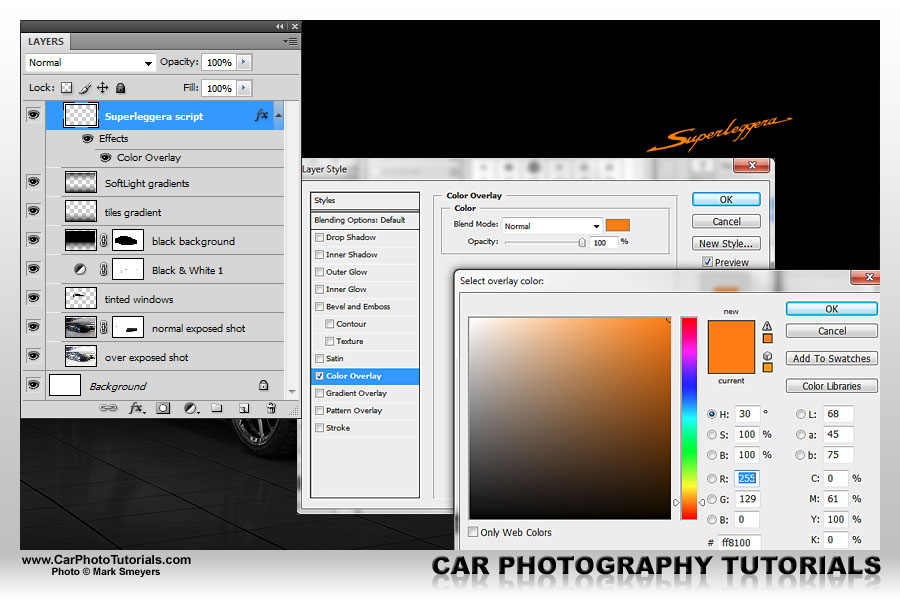
Just to make it perfectly clear we are talking about a Nero Nemesis shade on this rare Lamborghini Gallardo LP570-4 Superleggera I added a small line of text to the photo, now this is just right to be used as a computer background:
Keep in mind this workflow can be used on several photos you've taken at an event or inside a showroom, like this Murciélago model :
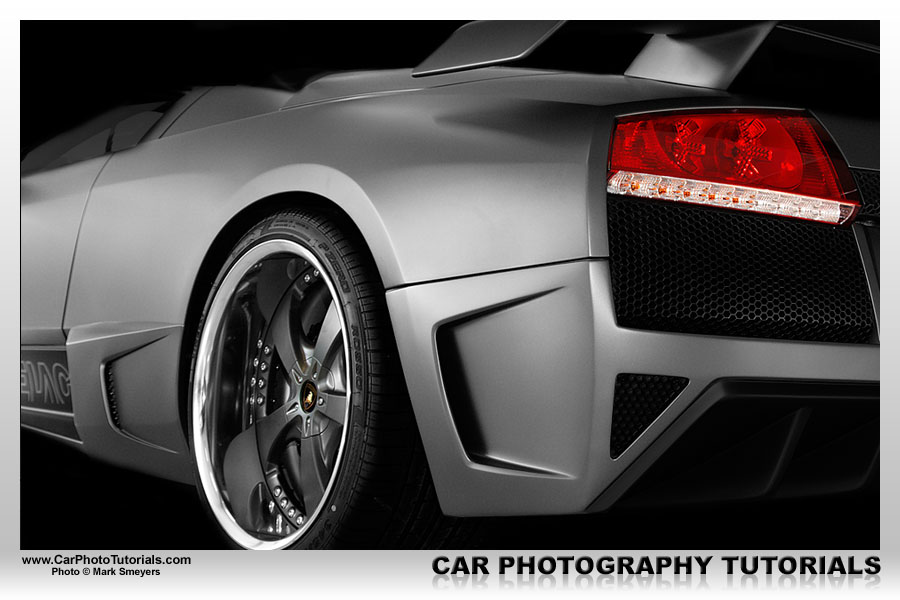
This just shows that you don't always need a massive studio setup to be able to get some amazing looking photographs, it does however take some post processing to get the look and feel you want to achieve ... but with the steps I've explained here I think you have a great starting point to create some amazing photos from your snapshots.
Feel free to mail us some of your work based on this tutorial, we are more than happy to advice you further on your own photographs.
 |
CPT Premium member BONUS : 87116 As a CPT Premium member you can download our PSD file holding all the layers so you can learn from it and do similar post processing on your own photos |
Note : commercial use or publishing of our tutorials in any way, written or electronic, is strictly forbidden, we present these for your personal development only. None of our material may be published in any way without prior, written permission from the Car Photography Tutorials founder. All workflows and photographs are copyright protected and owned by the Car Photography Tutorials team unless stated otherwise
Advertisement
Become a MEMBER
Premium Membership
Become a CPT Premium Member and download all our tutorials including a PDF for printing and the result as a PSD file with layers if any.
Interesting articles
Photographing an indoor car show like a pro
Indoor events and motor shows are great venues with many stunning cars, shooting them is not at easy as it might seem however.
Case study - Geneva 2009 Auto Show
In this in depth article we take a look at the specific settings and technique you could use for a high profile car show like the one in Geneva
Case study - DOF, Depth of Field
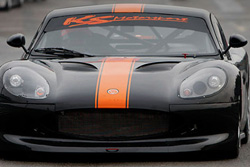
This shot was taken while the black Ginetta was leaving the pit lane at a famous circuit in Belgium, it looked good straight out of the camera, but a little bit of tweaking made it perfect.
Photographers need a website and a personal email address
I have seen it a thousand time, people trying to attract business with a general e-mail addres ... don't do this, just get a smal website and a personal email address.
Do I need a fistful of dollars ?
We get this question on a regular basis : how much do I have to invest to get started as a car photographer ? We explain our vision in this article : don't go for the cheapest way but get it right from the start.
Keep up with CarPhotoTutorials
Why not follow us, become a fan, get our RSS feed or mail a link to a friend ?
![]()
![]()
![]()