YOUR SECOND SHOPPING LIST
Canon EOS 350D - Canon EF-S17-55mm f/2.8 IS USM - 55mm 1/500 f2.8 ISO 100
Intermediate level tutorial by Johan
You have been getting to know your initial purchase for a while now, and you feel you are ready for bigger and better things. You’ve managed to make some photographs that received those much appreciated ‘oohs’ and ‘aahs’ and now you want to take it to the next level, so after some serious savings the time has come to put together your second shopping list.
 From now on you want to start playing in the big leagues, so you'll be adding some extras to your kit, perhaps even replace some items with better ones (read : more expensive ones), the better you want to go, the more money it takes, depending on what kind of car photography you want to specialize in you will be spending thousands of dollars on the corresponding lenses.
We have covered the basics in the Must have base equipment article, so we suppose you already own a DSLR body with the basic lense(s), hence we won’t go into those again for your second shopping list. We advice you not to change the body already but go for the higher quality lenses first, the latter will improve you photographs further than a new camera body at this time.
A new main lens
This option depends on which lens you started with ? Did you go for the basic kit lens or did you go the extra mile and got one of the better ones to start with, in the latter case skip this step and go directly to the next section.
 In case you've went for the basic kit you should ask yourself if you are happy with the quality of the photographs you have taken with this nice little lens ? Do you have color fringe at the sides of high contrast compositions, do you have a distortion in the image when shooting at the wide or the long end of the lens (on an 18-55 lens the wide end is 18mm while the long end is 55mm by the way), are you photographs sharp when using the lens wide open (using the lowest f-value possible, we’ll go into f-values later on) … if any of these questions got you thinking it might be time to look around for a replacement for your basic lens.
And now things get interesting … it all depends on how much money you want to spend on your new toy. You can start with US $200, however you can easily reach US $1000 and more when shopping for a replacement, so let’s take a look at what is possible to replace that standard 18-55 unit :
Going into the Canon camp a good bet is the EF 17-40 f4 USM lens, this is a L-type lens, meaning it is considered a professional lens, there is also an EF 16-35 f2.8 USM model, but this one is rather expensive, these two are called Full Frame lenses as they fit any EOS camera with EF lens mount, however if you are working with xxxD or xxD models like the 450D, 40D or 50D you can use EF-S lenses. In this case the very best available is the EF-S 17-55 IS f2.8 USM one, still costs a nice amount of money, but you won’t find a better one for the crop sensor Canon mount. Another one you could consider is the EF-S 17-85 IS 4.5-5.6 USM lens, a nice range and built in Image Stabilizer but with a few issues when it comes to car photography.
 You can also go for the so called third party lenses, companies like Sigma, Tamron, Tokina and other make various lenses for all kinds of camera bodies, and there are some very nice lenses available, at reasonable prices. As a general rule you can say that any Canon or Nikon lens will be about 20 to 50% more expensive than there Sigma or Tamron counterpart … are they worth that premium ? We will leave that up to you to decide, if you want my personal view on this : I only buy Canon lenses, I will save up a little longer to be able to afford them and go for the real deal. However I have several colleagues that are very happy with their Sigma equipment, especially the longer lenses from Sigma in their EX range are very decent.
A Sigma lens that many people are using today as a base lens is the 17-70mm f2.8-4.5 DC Macro, since it has a nice 2.8 opening at the wide end and allows for some macro photography too. Another very highly regarded Sigma is the 18-50mm f2.8 EX DC HSM unit, this one has a stable 2.8 aperture and includes HSM which results in very fast auto focus. we would stay away from all those 18-200 or 18-125 units that are available, they are very nice as a walk around lens while on vacation, but for the more critical work they aren’t really appropriate.
Tamron on the other hand has the 17-50mm f2.8 Di II lens in their line up, which starts 1mm sooner than the Sigma counterpart, and delivers some really nice quality too, this one does not offer HSM or USM however so expect it’s auto focus speed to be a tad slower.
Do you need a 'fast' lens ?
Now this next comment may not be what you want to read, but for car photography you do NOT need a fast lens ! We have your attention now don’t we ?
 What do they mean by a fast lens ? A fast lens is a lens with an aperture below f4 generally, so all those f2.8 ones are so-called fast lenses, also the 50mm f1.8 and 50mm f1.4 ones are very fast. They allow photography with decent shutter speeds when the surroundings get darker or when shooting inside, without reverting to higher ISO settings (why you should avoid high ISO we will explain in another tutorial)
So why don’t you need a fast lens ? Simply because with an aperture of 2.8 you will not get the entire car in focus when taking a three-quarter front shot (or rear shot for that matter), the DOF (depth of field) is too narrow to have both the front bumper and the rear wheel in focus with an f-value of only 2.8.
We’ll be using f5.6 or even f8 to get the entire car sharp, so why spend more money on a fast lens, which is my point exactly, the nice kit lens that came with your camera (like an 18-55 of similar) is not very sharp wide open, but you step it down anyway to f8 for instance, and in that case it becomes a lot more usable. Just about every lens out there will take substantially sharper images when using it at higher aperture setting, so there is no real need to go for the expensive f/2.8 lenses for automotive photography.
Then why did I spend nearly € 1,000 on a Canon EF-S 17-55 f2.8 IS USM lens when it isn’t of any use for car photography ? The one thing that fast lenses do offer is a brighter view in the viewfinder, and in case you put a polarizing filter on your lens every bit of extra light works wonders to check out your composition.
 We also guess you won’t be using your camera only to photograph cars, we bet your family would like to see you use that investment on birthday parties and school events too, and that is exactly the place a f2.8 portrait lens (as the range 35mm to 85mm is often referred too) really shines with it’s sweet out of focus backgrounds … but that is beyond the scope of these articles, we’ll focus on automotive photography for now.
So should you replace your kit lens with a new, better one ? Sure, if you have the money to spare, but if you are on a budget, keep it and read on for some other items that really will make your life easier when photographing cars out there.
The telephoto zoom lens
First things first : do you need a long telephoto zoom lens ? Just in case you've bought a 55-250 or 70-300 with your base kit, you should wonder if you actually used it a lot ? If not, don’t bother with a better lens in this range, but focus on the main lens from 18 to 55 mm and skip this step.
 We would however advice you to get a lens with a longer range than 55mm because it can produce some really nice car shots when used correctly. A longer zoom lens is used in two cases, firstly when you want to start shooting races (since you don't want to be located too close to those high speed cars) and secondly to create a nice background blur on static shots.
 If you want to go to the track you will need a long range, mostly 200mm isn't enough and you should consider 300mm or more, especially if you don't have press clearance to get closer to the track and in front of the fence. Just in case you are forced to shoot behind the fence you should use a 300mm or 400mm lens, our weapon of choice would be the Canon EF100-400mm f/4.5-5.6 L IS USM in this case, however we mostly have press accreditation and then the Canon EF70-200mm f/2.8 L IS USM would be long enough, we can always add a 1.4 TeleConverter to make it a 280mm f/4.0 lens, but more on that later on.
A bigger camera bag
By now you will need a decent bag to put your equipment in, the one you’ve got in your base kit won’t keep up with your ever expanding inventory, so it’s time to get a bigger, high quality bag to put it all together while keeping it secure.
 If you had the impression that selecting your initial DSLR was difficult get ready for the massive amount of bags that are available on the market, and at every price you can imagine.
Before you decide on your next carrying venture you should take a minute to think about what kind of material you intend to buy in the near future, if you are looking into getting a nice 100-400mm lens or a big 50-500 from Sigma, you’ll be needing a much larger bag right now, which you won’t use completely at first.
I have bought about six bags over the years because my collection kept growing, most of these bags are now tucked away in a closet somewhere, never to be used again … which is sad because these bags don’t come cheap.
 Take a look at the offerings from Lowepro, Tamrac, Think Tank, Billingham, Crumpler, Domke, National Geographic and Vanguard for instance, I can’t really decide this one for you, every kit is different, and every budget is different too. Personally I have owned Lowepro bags from the start and recently added a nice Think Tank system to my collection, but that’s me, you should decide this for yourself.
So how do you decide on a bag ? Get together the equipment you want to take with you when photographing cars and go to a local shop that has a nice variety of bags in stock. Try them with your material ! Nothing is more frustrating than to buy a bag only to find out that your DSRL with grip doesn’t fit comfortable into it, luckily the store had a nice return policy and I could swap it for a larger model.
A nice site to compare a lot of different bags filled with actual cameras and lenses can be found at : www.cambags.com It can help you to narrow down the search before you head out onto the shop to spend those hard earned dollars.
Angle Finder.
Everybody loves those low angle, very dramatic shots with a nice sky in the background, but with a DSLR there are difficult to do as you can’t see what’s happening on the screen (now we have live view or something similar but you can’t swivel the LCD screen anyway), you will have to be looking through the viewfinder to compose your shot … this is were an Angle Finder comes in very handy.
 This nice little gadget allows you to look on top of your camera, or to the side as you can swivel it over it’s axis. The Canon Angle Finder C even allows a 2.5x magnification to simplify composition of your shot, which is the one I have in my kit, and it has been used extensively for those special shots you can find on this site.
Nikon offers the DR-5 and DR-6 units (depends on which type of camera you have). Do note that all of these are rather expensive little items, but trust me, they are worth every single cent of their price, you can however find ‘generic’ units on the well known auction sites out there, so you can safe a few bucks buying a third party unit.
Remote Shutter
The next thing on your shopping list should be a remote shutter control system.
 These exist in different shapes, using a wire connection to the camera over IR system right up to RF units … with prices rising along naturally.
Why would you use a remote when you can simply press the shutter release button on the camera yourself ? There are two answers here :
If you put your camera on a tripod it doesn’t mean it won’t have a little shiver when you press the release, you will need a very expensive tripod to allow you to push down the shutter release without slightly moving the camera. When you use a remote you do not touch the camera, so there is no risk of movement (ok, the mirror slap will create a little tremble, but most decent tripods will counteract this)
Secondly, when you get started in rig shooting (don’t worry, we will have an entire article on this amazing way of shooting) you can’t reach the shutter button anymore, the car is moving, and either you are behind the wheel, either you’ll have to run alongside the car when it is moving slowly … so a remote shutter can safe the day here … and your life for that matter.
We use a simple wire remote on my cameras which doesn’t cost you an arm and a leg and works perfectly, you can even find extensions that allow a longer distance between you and the camera on it’s tripod, I have a 10 meter extension on mine and it works perfectly, so there is no need to spend lots of money on this thing. As always you can buy the original one from your camera manufacturer or go for a third party one you can locate online.
A flash
By this time a flash would probably be a good idea too, not always perfect when photographing a car, but a flash comes in handy at all times, go for the most expensive, best featured one you can afford. This one pays itself in the end, otherwise you’ll be buying that expensive, top of the line unit anyway in the future, so get your courage together and get it the first time around, if needed safe up your money a little longer, you won’t regret it, trust me.
 I will go into flash car photography later on, but you do need a flash on many occasions, so getting a good one straight away is the best way to go forward, don’t bother with the entry level units anymore, you are in the big league now right ?
Just for your information we actually use up to four Canon Speedlite 580EX II units and sometimes an MR-14EX Macro Ring Lite for special shots, you don’t need the latter one for regular car photography, but a nice 580EX would be a great addition to your kit. Nikon has the very nice SB-900 Speedlight by the way, while many people use the Sigma EF-530 DG Super unit … these are all top of the line units, so you won’t be needing a new flash any time soon when you get one of these.
An UWA lens
Ok, perhaps I’ve lost you here, an UWA lens is actually an Ultra Wide Angle lens, nothing more nothing less, and it comes in very, very handy when photographing cars during an event.
As this is a wide angle lens you can get closer to the car you are photographing, so you have fewer tendencies for people to walk in front of you when you depress the shutter, add a remote and you can actually see people approaching.
 On a crop sensor DSLR you will need to look into lenses that start around 10mm to get a nice wide angle, like the Canon EF-S 10-22mm f3.5-4.5 USM, one of the best UWA’s available for Canon cameras (do note it doesn’t fit the 10D, the 5D nor the 1D series), Nikon has two lenses here, the Nikkor AF-S 12-24mm f4.0 unit and the stunning Nikkor AF-S 14-24 f2.8, which is very expensive by the way but does offer f2.8 along the entire zoom range.
Naturally Sigma has an UWA too, the 10-20 f4-5.6 (HSM on some mounts) and the more expensive 12-24 f4.5-5.6 EX model, both offer decent quality for their price, Tamron also has a 10-24mm f3.5-4.5 DI lens, but more interesting is the offering from Tokina here, they offer a ‘standard’ 10-17mm f3.5-4.5 FishEye DX unit but more interesting is their 11-16mm f2.8 AT XD model, again with a fixed 2.8 aperture over the entire zoom range, and available for Canon and Nikon … and the best part : it’s a lot less expensive than the Nikkor counterpart !
So which one should you get ? A good question, we went for the Canon EF-S10-22 USM unit, mainly because it’s a Canon, so it should always work on any Canon crop sensor body we own or might buy in the future, and secondly because we don’t need a 2.8 aperture anyway when photographing cars. This kind of lens isn’t suited for portraits so it’s use is limited to cars and landscapes … and in both cases you need the highest f-value you can manage anyway.
A circular polarizing filter
If you are serious about car photography you need a decent polarizing filter, don’t bother with those low end, low cost units you can find online or in a local store, go for the well known makes like B+W and Hoya. They might be a bit more expensive, but just remember that any kind of filter you put in front of your lens could degrade the quality of the photograph you are taking, so don’t take any chances and get the best possible. There are two downsides to these filters : for one they are rather expensive and secondly you can’t blame the filter when your photo turns out bad afterwards.
The first problem, price, you’ll soon forget about when you see the results on your screen, a good polarizing filter will generate nicely saturated colors and take away the glare on the windscreen of the car, so you can actually see inside. These filters also give you those nice blue skies you see in the best automotive photographs out there.
The only downside to a polarizing filter is the fact that you will have less light hitting the sensor, something in the region of one stop less light actually. This means that your shutter speed will suffer from this, instead of reaching 1/60th for instance, you’ll end up with something like 1/30th with the filter installed, so you do not want to keep it on the lens at all times.
 The best times to use a polarizing filter is during outside events in bright sunlight, you have more then enough light, so you can afford to get one stop down anyway.
There is a second problem to filters, you will need one for every size of lens you have, the front element on most lenses varies in size, hence the filter you can put in front of it will have to be different too, you can however use step-up rings. These allow you to buy the largest size filter you need and use the step-up rings to put it on smaller lenses. By the way 77mm is a very common filter format on most high end lenses, so you should definitely get at least one 77mm polarizing filter.
I’ve bought the B+W 77mm Kaesemann Circular Polarizer Filter with MRC coated glass, it is expensive but when you use it a lot like we do it is worth the initial investment. Luckily nearly all my lenses use the same 77mm size so we only had to buy this one to be set.
NOTE : make sure to get a circular polarizing filter, there are also linear polarizing filters out there, these are less expensive most of the time, however they can cause problems with the auto focus on digital cameras, so keep away from them.
Extra batteries
You never have enough batteries with you, both for the camera and for the flash (or the image tank you might use), so get some extra’s. if your camera accepts AA units get them rechargeable, this will safe you a lot of money in the end, also try to find those with a decent capacity, we have 2700mAh GP units, but their 2500mAh work fine too. Don’t go for the very cheap ones, they don’t support as many charging cycles as the better known ones, take a look around in your local shop and ask their opinion if you can’t pick one.
Also try to avoid using a quick charger, putting 2700mAh worth of power into a battery in 15 minutes isn’t the best idea most of the time, you will need a high end charger to be able to do this, get one that takes an hour or two to charge them, this way you are sure they are 100% charged when they come out.
We ended up with two chargers, a nice digital one that can recycle batteries to get them back into shape and a quick charger for those times that we can’t afford to wait two hours or more (which is constantly these days …)
If your camera has a proprietary battery system you should get at least one extra battery for it, we stick to the brand ones, but many people use third party batteries in their cameras without any problems. When using your camera keep your second battery in your pocket with the protective plastic cover on it naturally.
This way the battery stays warm and keeps it’s reserve much longer than when you would put it in your bag, where it is a lot colder sometimes.
Extra memory cards
Just like batteries, you can’t have too much memory cards ! With the current prices for these CF or SD cards you simply can’t afford to run out of memory during a photo shoot.
 We would go for a few large cards instead of one massive card, we know there are CF cards right up to 32Gb in size, but we would go for a selection of smaller cards for some very good reasons. If you shoot all weekend with one large card and something happens, your camera gets stolen, the card get damaged … you’ll find yourself with no photographs whatsoever. However should you use a set of 4Gb or 8Gb cards you’ll end up with at least a large part of your photographs still intact, just don’t drop your memory card wallet anywhere !
At this moment we use two bodies when shooting an event, and have three SanDisk 8Gb CF cards for every body, with a clean and simple labeling system we never mix these cards between cameras, and we always have the guarantee that we'll at least have a large part of my images when we get home.
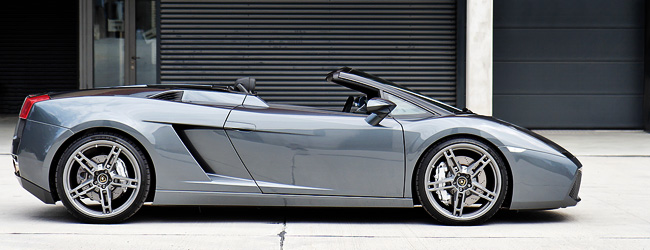
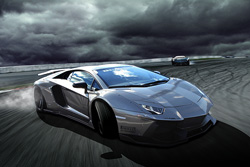
Note : the images on this page have been used for review purpose only, feel free to take a look around for other makes than those mentioned in this tutorial, the final choice of your equipment is yours ...
 |
CPT Premium member BONUS : 48322 If you would like to print 'Your second shopping list' feel free to download our special PDF which is optimized for hardcopy layout. |
Note : commercial use or publishing of our tutorials in any way, written or electronic, is strictly forbidden, we present these for your personal development only. None of our material may be published in any way without prior, written permission from the Car Photography Tutorials founder. All workflows and photographs are copyright protected and owned by the Car Photography Tutorials team unless stated otherwise
Advertisement
Become a MEMBER
Premium Membership
Become a CPT Premium Member and download all our tutorials including a PDF for printing and the result as a PSD file with layers if any.
Interesting articles
Common mistakes when shooting a car
We all made these mistakes at first, but after gathering some more experience we could pinpoint these mistakes and share them with you so you can avoid them.

Case study - deTomaso Pantera
I take a reasonably good shot and put it through some extensive post processing to create a photograph

Car photography that sells the car
Selling a high performance car isn't easy, but as they say : a picture speaks a thousand words. We'll show you how to get the winning shot that will sell the car quickly by selecting the correct background and perform the right post processing.
Virtual tuning in post processing
Sometimes the car you want to photograph just doesn't exist in real life, so you start with a regular model and virtually customize it in post processing ... and this time I show you all the steps in a video

Old fashion digital photographs
In this tutorial we show you how to recreate the look and feel of the good old days on a modern day digital image.
Keep up with CarPhotoTutorials
Why not follow us, become a fan, get our RSS feed or mail a link to a friend ?
![]()
![]()
![]()