THE SECRETS BEHIND A GREAT CAR PHOTO
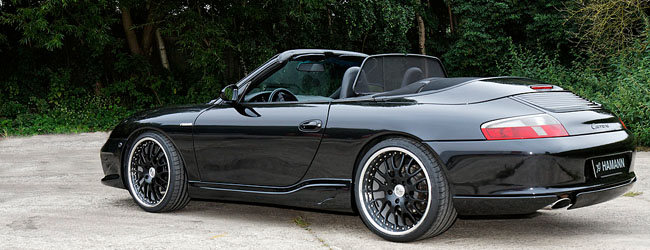
Canon EOS 40D - Canon EF-S17-55 f/2.8 IS USM - 28mm 1/100 f4.0 ISO 320
Basic level tutorial by Mark
Secret 1 : the Rule of Thirds
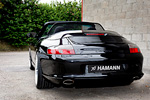
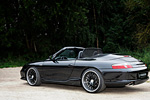 We've selected a random shot of a Porsche we've made a while ago to show you the first thing you should remember when photographing a car ... or anything else for that matter. Take a close look at the image of this black German sports car, you will find it a pleasing image, but why is this you might ask ?
It doesn't have much to do with the fact that it is a beautiful car, but more with the way the shot has been composed, ever since the early days of photography one thing was made obvious, if you place the main object in your photograph along one of the axes in the Rule of Thirds grid the viewer is automatically drawn to it.
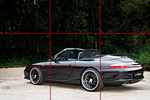 The shot of this black Porsche clearly puts the car on the lower axis and a bit to the right of the frame, remember our Common mistakes when shooting a car ? We mentioned you should never put the car right in the middle of the frame, and this is why !
The Rule of Thirds (or Golden Section as it sometimes called) actually put imaginary lines across the frame at 1/3rd intervals, this concept has been used by photographers for ages, and it works equally well for automotive as it does for portrait or fashion photography, naturally this is just like any other rule, it can be broken on occasion, but try to think about it when you have a car in front of your camera the next time.
Nice to know : something you should remember about your camera : most of the time we will tell you to select the middle AF point only to avoid having the focus on the background instead of on the car, but after you focus, you will have to re-compose your shot to get the car on the Golden Section. This is done by half-pressing the shutter with the middle AF point on the part you would like to have in focus, then keeping your finger on the button you move your camera to a position that shows the frame just the way you want it to look, remember that the light measurement could change along the way when you do this, that's why we work in Manual mode most of the time.
Don't think you can crop the image afterward in editing, you should compose your shots so that you have the least amount of work afterward. Think about this, you've covered an event and returned with hundreds of shots, some you will probably delete right away, but imagine the work it would take to manually crop all these images on your computer just because you didn't bother to compose correctly when shooting them !
Secret 2 : the Angle of attack
Get out those car magazines you've been collecting for ages, notice something in general about most of their cover shots ? Probably about 90 percent of all covers show a car from a front three/quarter view, this is without a doubt THE most popular angle to shoot a car, so why shouldn't you do the same ?
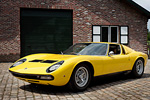 You could decide to go about shooting cars differently, but if you would like to get your material published we suggest that you at least include a few of these classic shots in your portfolio, they work wonders for those people that end up paying the bill.
The actual angle is different depending on the style of car your are shooting, a convertible for instance would be showing more of the side to emphasize the fact it doesn't have a roof, while a sedan would look better with more of the imposing front in sight.
One of the reasons this angle is so popular is the fact that it clearly shows the design of the car, if you look at the yellow Lamborghini Miura in this shot you can recognize the swooping lines of both the front and the rear while still getting an impression of the very low stance of this car, just what people like to see in a shot of such a rare car.
Secret 3 : get down to earth
 When you see a car parked somewhere you are looking at it from eye level, this is how people will mostly see any given car all the time, so when you are photographing a car you should consider other options. Don't just stand upright and take a shot, lower yourself to the headlight height for instance, you'll immediately notice your shot is much more intimidating.
Do try to avoid taking a shot where you actually can see the background underneath the car, this doesn't work and actually ruins the shot, you should show the ground hugging stance of the car, not demonstrate how much ground clearance exactly remains.
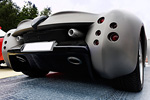 Very low angle, and high angle shots work well too by the way, expect to get your clothes dirty when you want to do a low angle shot (an angle finder sure helps out here by the way) and forget the tripod for this kind of shot, a nice cheap bean bag will work wonders to support your camera however.
The downside of such extreme low angle shots is that your sky will most likely be blown out, turn totally white instead of a nice blue sky we all like so much, this can be remedied with a gradient filter or by taking two shots with different exposure, we will show you exactly how this is achieved in our 10 tips for your first outdoor car shoot tutorial, where we also show you how to bring those high angle shots to a good end without braking your back in the process.
Secret 4 : Concept
This is something that most beginners tend to forget, we see it all the time, they see a nice car parked somewhere and they attack it with everything they've got, taking shots from every possible angle without even moving the car ... this doesn't work, believe us.
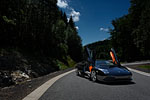 We know that from time to time they get lucky and have one or two shots that are worth printing, but that's called luck not expertise. You should think about your shot before taking it, that's the concept behind your image, think about how you would like to show that particular car that's in front of you
Take a look at the shot of the black Lamborghini on the right, this particular image was taken in the early afternoon on a bright sunny day in late June ... it can't get much worse than this ! We had little time for this photo shoot, it was taken at an Italian car event and it wouldn't take too long before other people would find out about this car and start running into the frame. So it took some serious thinking and positioning of the car to get this one to a good end ... the owner just loved this shot. Take a look at the Case Study for this shot to get an idea how we made it work.
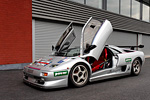 Think about what makes that particular car special, what it is that sets is apart from other cars ? On the black Lamborghini this was easy, the upwards opening doors are a trademark on these cars, so we shot it with the doors open.
You have to decide beforehand what you would like the world to see about this car, what you want to show that is so special or unique on the car you are shooting. This will determine your angle of attack, remember not all shots have to show the car in a 3/4 front view, there are other angles to show. If you are about to shoot a race car there is no point putting it on a grass plane, it just doesn't fit there, in a deserted pit lane it would shine. Same thing for an off-road car, don't shoot it on a parking lot, get it out in the field ...
Secret 5 : Location
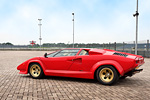 Location is everything when shooting cars, we've already talked about it in our concept section, but it is so important that we return to it separately in this section, if you location is bad your car shot will be bad too, there is no getting around this one.
Your location should have an uncluttered background, the car is THE most important item in the shot, don't have something in the background draw attention away from the car, also check for trees or poles sticking out of the car. The shot of the red Countach is not great because you have stuff growing out of the car, this should be avoided if possible. Also note that red cross in the background, it draws attention away from the car, another thing that brings this shot down to near snapshot level unfortunately. It can be remedied afterwards in editing naturally, most of the time we have to revert to this option anyway, take a look at the Case Study to learn how we rescued this shot from the trash.
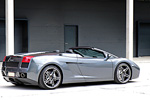 So what makes a good location ? Simple, it should either contrast or complement the car, a black car against a dark wall can give you a nice low key shot, but put it against a bright wall at it jumps out of the frame, grabbing attention on it's own, which is the point of shooting the car in the first place.
Most of the time you can select your location when doing a car shoot, naturally there are times when you are limited in options, but we would suggest getting a location that complements the car nicely and that doesn't draw a crowd the moment you show up with an exotic super car, nothing worse than having people standing in the reflection on the side of the car.
Secret 6 : Fill her up Sam
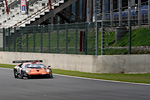 Perhaps an obvious one, but we've seen shots that took us a while to find the car in them, no kidding. You should fill the frame with the car, you are shooting the car, not the surroundings.
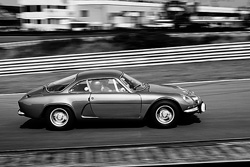
The shot of the race car here could have been much better if we'd waited a bit longer to have it closer, or use a longer focal length to shoot it, now we have way too much background to have a nice shot.
Probably the only reason to take shots with a lot of surroundings is when you are shooting for a magazine, with this kind of shots the editor can put text next to the car and still use the entire picture, but other than that we would advice you to use the entire frame to picture the car.
Secret 7 : Polarize it
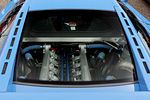 A very important item in your bag should be a decent polarizing filter, it will help you to avoid unwanted reflections when shooting a car. Most cars are extremely shiny and the glare on the windows will hide the interior from you, that's why you should use a polarizing filter.
It will allow you to see the interior through the windows and remove nasty reflections from the paintwork, remember it is not a magical tool, it will not make all reflections disappear, but rather limit them. A polarizing filter is best used on a bright and sunny day or with your camera on a tripod as it will actually limit the amount of light that is able to reach the sensor, so your shutter speed will drop when mounting such a filter on the lens.
Using a polarizing filter takes practice, we've even put a special tutorial on filters on this site so you can learn how to apply them correctly, you don't really need one, but we strongly advice you to get one anyway, and while you are at it, get a good one, they don't come cheap but are well worth it in the end.
Secret 8 : Time
 Timing is essential when shooting a car, you can't do an award winning photograph when you're on a tight schedule (well you can actually, but it takes experience) so when you are finally able to convince the owner of a nice car you just have to shoot it, you should warn him that the session could take some time, we take at least one hour for a photo shoot, but preferably we tend to stick to a four hour minimum.
This will allow you to re-position the car during the shoot to have different angles and even different locations during the session, you can take one hundred images with the car in the same position, but this isn't how you should to it, both you and the car should experiment with different locations, angles, light and so on.
A question that often reaches us is when to shoot a car, the standard answer here would be to say either early in the morning or late in the afternoon, and we must admit that this isn't a bad idea, but it isn't always possible depending on the schedule of the owner. We always make an appointment to shoot a car in the afternoon, we start at around 14h00 to 15h00 and tend to work until it's finished, which is mostly up to around 19h00 ... when the owner starts to look at his watch it is a good time to round up the session.
Wrapping it up
We hope that these eight secrets will get you thinking how to perform your next car shoot, as always these are not strict rules you should live by, they are just a basis to get you started, you should put your own ideas into action and create the shots that you like, not those that everybody else likes. However keep in mind that if you intend to make money with your photographs you must first please the crowd out there to get noticed by a magazine or publishing agency. You will be shooting the images they like because they end up paying for your work, if they don't like it chances are it will be a one time contract only.
The trick is to put your own trademark into the shots but not make them so extreme as to have nobody but yourself liking the images afterward, it is good to have your own style, just try not to be too extravagant in it.
 |
CPT Premium member BONUS : 86859 If you would like to print the Secrets behind a great car shot article you can download our special PDF which is optimized for hardcopy layout. |
Note : commercial use or publishing of our tutorials in any way, written or electronic, is strictly forbidden, we present these for your personal development only. None of our material may be published in any way without prior, written permission from the Car Photography Tutorials founder. All workflows and photographs are copyright protected and owned by the Car Photography Tutorials team unless stated otherwise
Advertisement
Become a MEMBER
Premium Membership
Become a CPT Premium Member and download all our tutorials including a PDF for printing and the result as a PSD file with layers if any.
Interesting articles
Your second shopping list
You have all the basic equipment, and you feel comfortable working with it ... now it's time to take your gear to the next level.
Running PhotoShop actions with a G13 or G510 gaming keyboard
I am a big fan of automating workflows in PhotoShop to speed up post processing, after a while I had a lot of ctrl and alt key combinations so I bought a gaming keyboard, first the Logitech G510 and later on I added the Logitech G13
Our TOP 10 tips for post processing using PhotoShop
In this tutorial we present you with 10 interesting and quick tips that will make your post processing automotive photographs in PhotoShop a bit easier.
Using actions to add a watermark to your photos
We show you a way to add a custom watermark to all your photos, no matter if they are in landscape or in portrait orientation using actions that require no manual intervention.
Must have base equipment
In this article we talk you through the large amount of camera's you could buy to get started well in automotive photography.
